If you are looking to applying for a passport or renewing your current one, you need to take a passport photo. You can choose to go to a professional photographer, but you have to decide which one, get ready, reach the place, and waste a lot of time. Or you can also choose to go to a photo booth, but you should know where to find one, and you don’t have unlimited chances to take the perfect photo. Instead, you can take your passport photo by yourself.

How to take Passport Photos at Home?
Technology has boosted everyday life by giving people new efficient ways to accomplish things. Instead of being stuck behind queues or wasting time, you can take your own passport photo directly at home or office.
The passport photo requirements are:
- 2 x 2 inches in size (51 x 51 mm)
- in color
- taken within the past six months
- clear and in focus, it can not be blurry or out of focus
- no other objects are allowed
- eyes must be open
- avoid red-eyes
- eyes should look straight at the camera
- hair, glasses, or other objects can’t cover your face
- neutral expression
- white background
- no filters can be used

How do I take my own passport photos?
You can decide to take your own passport photo at home, it is easy and quick. But there are some requirements you should follow to not get your photo rejected.
- Can You Take a Passport Photo With an iPhone?
- Can You Take Passport Photos at Home
- Passport Photo With an iPhone: How to Do It?
- Digital Camera Passport Photos – Guide
- The Best Way to Take a Passport Photo – A Quick Guide
- How to Take a Baby Passport Photo – A Quick Guide
- Passport Photos at Walmart
- Where Is the Cheapest Place to Get Passport Photos
Background
If you want to take your passport photo, stand in front of a white background, you can choose a wall or if you can’t find one, you can use a big white paper sheet or a white bed sheet.
Light
For your passport photo, choose a place near a window or with good lighting, moreover, the light should not create a shadow on your face, so it would be perfect to take it in natural daylight.
Facial expression
For your passport photo, keep a neutral facial expression, you can have a natural smile, but don’t exaggerate your expression.
Glasses
It would be better to take your glasses off when you take a passport photo because it can create a reflection. But if you are unable to take them off or you have medical reasons, be sure the lenses don’t create any reflection, your full face is completely visible, and your glasses are not obscuring your eyes. Moreover, when taking your passport photo, be sure to keep your eyes open and avoid the red-eye effect.
Make-up
When you take your passport photo, if you want to wear make-up, choose a foundation that matches your skin tone, blend it till your neck to avoid different colors of your face and neck; avoid strong contouring and bright colors on your lips. It would be better to choose matte powder to avoid oily skin.
Clothes
For your passport photo, it is recommended to wear clothes you wear on daily basis, it would be better if they are one color and they should not be white as the background. You are not allowed to wear a hat, your head can be covered only for religious reasons, but your face must be visible. Avoid wearing prohibited clothing and accessories.
Don’t be shy to take a lot of photos
Until you are satisfied with your passport photo, don’t feel shy or afraid to take as many photos as you want. The more photos you take, the more possibilities to find the best one. That passport photo will be on your document for ten years, so take as many as you can till you take the perfect one.
Things that can get your passport photo rejected
Passport photo errors can be avoided if you pay careful attention to details. There are common mistakes that make your passport photo rejected. For example bad lighting or shadows on your face, the background is not neutral, the size is wrong, your hair or hat is covering your face. So pay attention to these factors and follow the passport photo requirements.
How to print your passport photo at home?
After you take your own passport photo, you might need to print it. First of all, remember that your photo has to be colored, otherwise, it will be rejected. Here are the steps you should follow:
Select the photo
First of all, select the passport photo to print.
Select the printer
Choose the printer you want to use, it can be the one you have at home, but check if it can print colored images.
Set your printer for color
Open the settings of the printer, and choose to print in color (do not choose grayscale).
Check the printer ink level
Before printing your passport photo, check the printer ink level and be sure there is enough color.
Select paper
Choose high-quality paper to print your passport photo on.
Select quality
The quality of your passport photo should not be less than 300 dpi.
Click on print
Click the ‘print’ button, and wait for your passport photo. Once it is ready, you can cut it and it’s done.
Take your passport photo at home
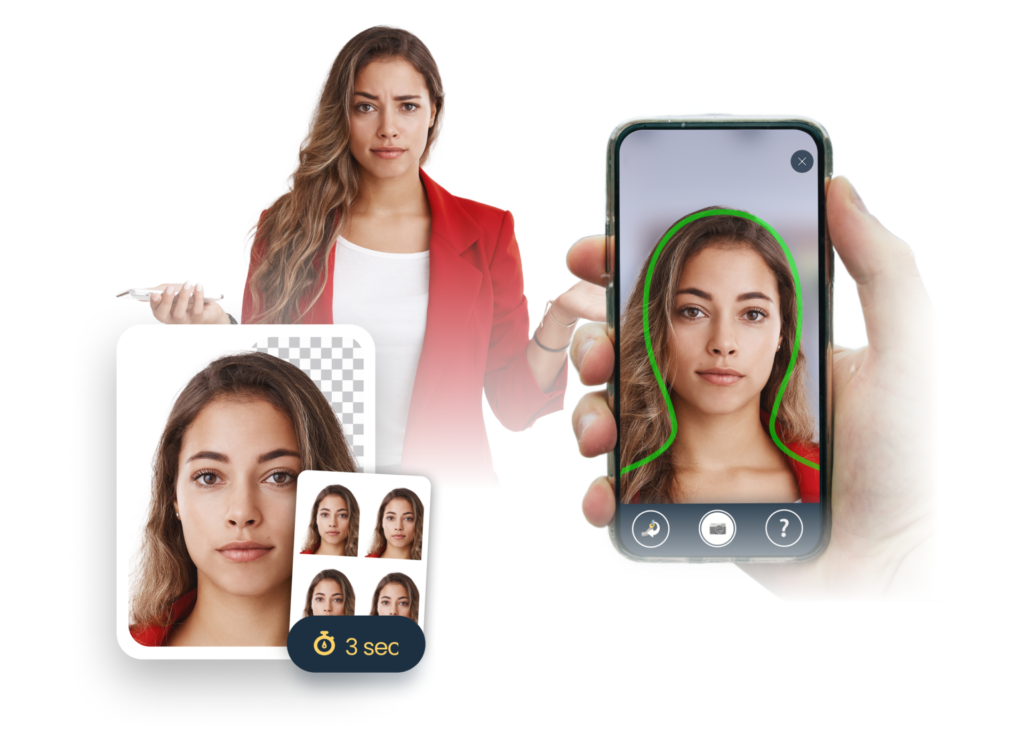
Taking your passport photo at home is possible and you will be very satisfied with the result. The best and easiest way to get your photo is using our app or online photo tool. It’s very easy, you won’t waste time and you just have to follow few steps:
- Choose a room with good lighting, stand on a white background and take your picture. Remember to follow the tips we gave you: wear natural makeup and nice cloth, do not wear a hat, if it is possible take off your glasses, look straight at the camera and keep a neutral facial expression.
- If you ask somebody to take your picture, tell them to stand three feet away. If you’re alone, don’t worry! You can place your phone on a tripod or take a selfie, our tool will help you.
- If you don’t like the picture, never mind, you can take as many as you want.
- Once you have taken the perfect one, submit it via app or an online editor.
Taking your own passport photo has never been so easy. Our passport photo tool will assist you to get a passport photo that meets all the requirements.
Once you have submitted your photo, our photo background editor will remove any objects visible in the frame and it will replace the background with the required color. Then, the passport photo cropping tool will resize your picture to meet the requirements of 2×2 inches and automatically create a photo template. You can decide to print it by yourself at your home or decide to buy it and it will be delivered directly to your home. The last, but very important step, is the passport photo checker: it will check the final picture and verify if there are some elements that will make your photo rejected. The AI will tell you if there are things to be changed, for example, if your face is poorly lit, if it is blurry or if your eyes are squinted.
Trust me, this is the right tool for you and you will love taking your own passport photo with it. You can choose our passport photo online tool or our app, both Android Passport Photo App and iOS Passport Photo App are available.
Android Passport Photo App
This app works how a photo booth, but the entire process lasts few seconds and you don’t need to go out to take it. This is very important during this period of the pandemic because you can choose to not risk your safety. You just need to open your Google Play store and download the Android version
iOS Passport Photo App
You can do the same for iPhone, open your iCloud and download our app, you won’t regret it. It will assist you with any problem and tell you if there are things to be fixed.

