What is the best way to take a passport photo, you might ask. There is, after all, a certain artistry in taking quality photos and if you’re thinking of doing your best and snapping a perfect passport photo, you’ve come to the right place.
Join us as we explore how to take the best passport photos, what to do and what mistakes to avoid. We’ll also cover useful tips and tricks, official passport photo requirements and everything else you might find useful to end up with a great passport photo.
Table of Contents
Passport photos & crucial requirements
A passport picture is a key feature in your most significant travel document, so it is only logical that the image that appears in the document should be compliant with all passport photo requirements established by the government of the United States of America.
That is why the best way to take passport photos includes, first and foremost, getting familiar with the rules surrounding the whole matter.
- Neutral face expression or a natural smile
- Face the camera directly
- Full face visible
- A color photo of high quality
- The correct size of the photo (2 x 2 inches)
- Undamaged photo with no holes or smudges
- White background

Mistakes you should avoid when taking the passport photo
The rules surrounding passport photos are obligatory and you would do well to not only heed their advice but also pay close attention to what follows, meaning mistakes one should avoid while taking the best passport photo possible.
- Can You Take Your Own Passport Photo?
- Can You Take a Passport Photo With an iPhone?
- Can You Take Passport Photos at Home
- Passport Photo With an iPhone: How to Do It?
- Digital Camera Passport Photos – Guide
- How to Take a Baby Passport Photo – A Quick Guide
- Passport Photos at Walmart
- Where Is the Cheapest Place to Get Passport Photos
Digital changes to the photo
The photo you’re about to take is supposed to be an accurate representation of your natural self and the best way to identify yourself when traveling abroad and going through checkups.
You can go ahead and take care of the red-eye effect but please be advised not to tinker with the photo in a way that might cause confusion upon checkup.
Lighting
Good lighting is crucial for a valid passport photo and the best way to take a passport photo includes making sure that the person in the frame isn’t overexposed. Play with light only to a certain extent so that it looks natural and not excessive. Once the face is properly exposed, that’s your cue.
Smiling
It’s a natural impulse to smile when you’re taking your own photo or someone else takes a photo of you. Now, you already know that a natural, slight smile is perfectly acceptable but you should still do your best to retain a possibly neutral expression.
Attire in passport photos
The clothing you choose for the photo session is a matter that deserves a longer explanation because passport photo guidelines are very specific and meticulous.
Please remember to wear clothes with straps or with a neckline that isn’t too revealing. Be certain that in the photography you look like you actually have something on.
Pay attention to the white background and realize that wearing a white-colored t-shirt or a blouse will not do. Go for something more colorful instead, so there’s a clear distinction between your clothing and the background.
Consider what you wear on your face or head and should you use glasses or any other form of headwear, take off everything for the passport photo. Even a headband or any other larger hair accessory is off-limits.
Only a signed note or a doctor’s statement can result in you being allowed to remain in the headgear you use for religious or medical purposes.
Useful tricks for a perfect passport photo: how to look best in a passport photo
The good news is that apart from restrictive rules surrounding passport photos, you can still turn your new picture into a great one. All you need to know are a number of tricks that will ensure your own passport photograph looks good and you don’t cringe every time you take a peek at it. Here’s how to take a passport photo yourself.
Take lots of photos
The first trick may sound simple enough but it actually is quite important. You want to give yourself some options and choose a perfect picture for a passport photo.
Spend some time with the digital camera and don’t worry about time. A good and valid photo, compliant with all the requirements like neutral facial expression and so on and so forth, can be a lengthy process either way so be sure you’ve got options to pick from.
Show off that magnificent jawline
Another way to improve the quality of passport photos is moving your head slightly upfront. Once you do that not only will your face look better because your jawline will be more defined and pronounced but also it might even make things simpler during passport checkups.
Fixing the hairstyle
Your hair and the way you style them is largely up to you as passport photo requirements are rather lenient in that regard. Still, you should know that sometimes you will need to alter the hairstyle a bit so the photo can turn out perfectly fine. To do that, stick to hair bands or hairpins. You can wear your hair in a ponytail and use pins to keep everything up there under control.
Concentrate on the eyes
Your new passport photo needs to show your full face including your eyes in all their glory, which often means that people try to keep them wide open, even forcing them open to a certain extent.
To make sure the photo meets the requirements and looks good you may choose a different approach in regards to your eyes, so listen close.
When you try to hold your eyes open, it alters your face in more ways than you think. Your eyebrows go higher and you can wave the natural look goodbye. This creates an image you might not be fully content with, but luckily there’s a solution.
In fact, you might even squint or close your eyes just a little bit, which will not only look better than forcing them open but it will still be considered perfectly valid and your photo will be deemed acceptable at the passport acceptance facilities.
You might also be interested in:
- How to Turn a Photo Into a Passport Photo
- Can You Have Bangs in Passport Photo? Everything You Need to Know
- What Happens If Your Passport Photo Is Rejected
Best way to take children’s passport photos
Perhaps you wish to take a child’s passport photo? In that case, you should know that the vast majority of rules and regulations remain the same as adult passport photos, which means you’ll need to pay attention to details and double-check everything before going ahead with the passport application. Here’s how to take an infant passport photo.
Recreate the perfect setting for the photo shoot using white walls or sheets, check if there’s anything to cast shadows over your child’s face and choose the best light. Once that is done all you need to do is find a comfortable place for them to sit, tell them to look straight into the camera and remind them not to smile too widely.
If the child is really young and taking the passport photo is proving quite challenging, you can still make sure the photo turns out just right. All you need is a plain white bed sheet and two white towels
Fold the towels and place them in such a way that they “hold” the baby’s head in one place. One to support their neck and the other around their head to keep them facing the camera.
Take a look through the camera and make sure to position yourself in such a way that passport pictures can come out good and valid. The recommended distance, for example, is about four feet away from the person in the photo, but in this instance when you’re attempting to take your child’s own passport photos, one or two feet might be enough.
Then, you just need to grab their attention in one way or another and when they’re looking in your direction, snap away. That’s how to take an infant passport photo.
Final touches on passport photos
Once the photo has been taken the last step on your journey is to crop it and perhaps apply a few corrections so it passes muster at the acceptance facility.
The good news is that you can choose from a plethora of applications, websites or software that will assist you in altering passport pictures just the right way. Adobe Photoshop or Lightroom, for instance, which can help you tremendously with editing your own passport photos, remain favorites to this day.
You just need to find the right settings and input crucial information like the required size of the photo, the perfect, high resolution or even the right kind of format for online submission.
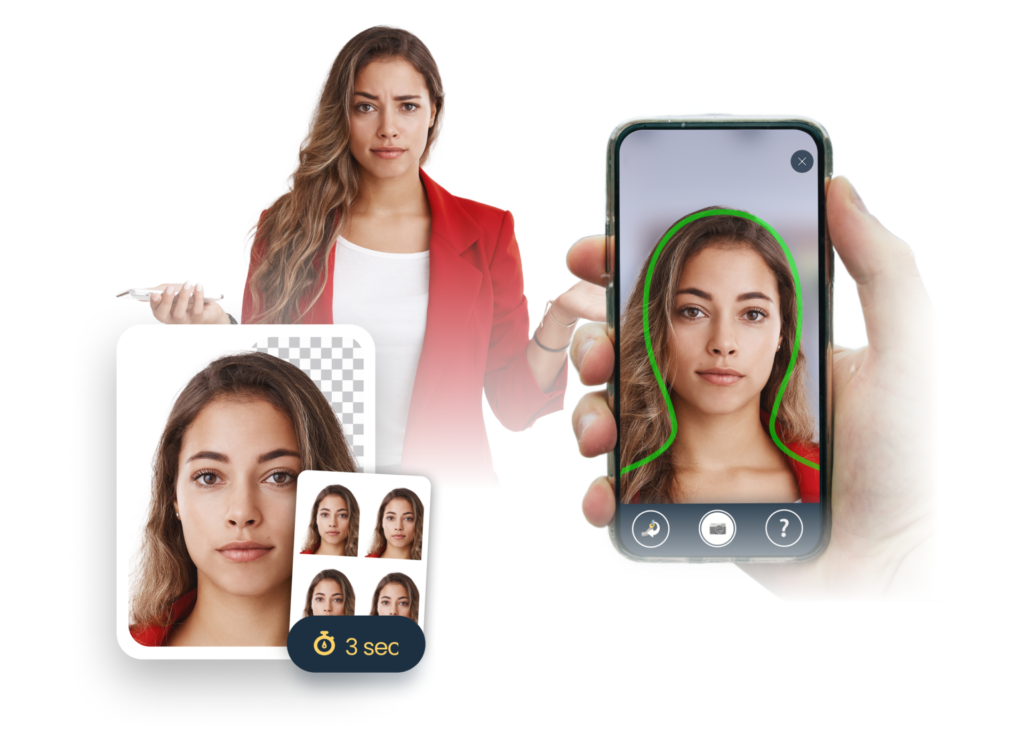
What’s more, you can use tools such as Passport Photo Online to make sure your passport pictures turn out great. The tool will apply all the necessary and allowed improvements or fixes for you.
The best way to take your passport photos
As you can see there’s a handful of rules and requirements you need to follow when taking passport photos but luckily now you’ve got some tricks up your sleeve. You know what not to do as well as what recommendations to follow in order to produce a photo you’ll love in the end.
You just need to pay attention to the official guidelines and consider how you can make your eyes pop or how to accentuate your jawline in a way that would be acceptable.
FAQ
Where to take good passport photos?
Ideally, you’d pick a local photo studio that will create a perfect setting for a passport photo. You can also take good photos at your local post office.
How to pose for a passport photo?
When you’re sitting comfortably and ready for the photo, simply face the camera and keep the head centered in the frame. Sit straight and do not tilt your head. Also, remember to either keep a neutral expression or smile only slightly.
How do I take a passport photo at home?
To take a passport photo at home you need to recreate a perfect, photography studio-like setting. This includes finding the perfect spot, taking care of the background, pushing away any objects that might cast shadows and using or applying the right kind of lighting.
Ideally, you would ask someone else to stand roughly four feet away from you and take a number of photos to choose from. Once you take your pick, you need to make sure everything is in order, which means you will need to turn to editing.
In the editing process, you input the right photo measurements in the boxes, as well as correct resolution settings, and crop the image accordingly.

Graduated from the University of Warsaw, Michał, is a travel expert with an undying thirst for adventure and a writer at PhotoAiD. A self-proclaimed book and movie critic as well, he’s always eager to visit to the most underrated or less popular travel destinations.