If you want to edit your own U.S. passport photo according to the official regulations set by the government of the United States, you might try using the GIMP program. In our article, we’d like to take you through the process of editing U.S. passport photos in GIMP.
Table of Contents
Create your own passport photo using GIMP: the process
Before you start working on your U.S. passport photo in GIMP, you will need to familiarize yourself with how this program works.
Keep in mind that this process may be time-consuming, especially if you lack previous experience with graphic editing programs.
Creating your passport photos in GIMP can be understood in two ways:
- You already have a properly taken photograph (with a white background) that only needs cropping to a desired (2 x 2 inches) size.
- You have a photograph that needs to be adjusted to meet passport photo requirements, e.g. remove the background.
We’d like to present you a step-by-step guide that covers the first scenario (only cropping to a desired, printable size), showing what you will generally need to do to get your U.S. passport photo made in GIMP.
- How Can I Convert My Photo to Passport Size for Free?
- Can I Get a Passport Photo Online?
- Where to Take Passport Photos Online?
- Is There a Free Passport Photo App?
- What’s the Best Passport Photo Maker?
- Creating Lightroom Passport Photo – DIY
- How to Make a Passport Photo in Photoshop – Tutorial
- Online Passport Photo Softwares Review: Visafoto vs. PhotoAiD
If you need a walk-through tutorial on how to remove a background from a picture (second scenario), we provide an easy as ABC solution at the end of this article.
In a nutshell, the process of getting your passport photos with GIMP takes 3 (three) steps:
- Take your passport photo according to the requirements set by the government of the United States (learn how to take 2×2 photos at home here).
- Edit your picture to meet the U.S. passport photo standards.
- Save your new passport photo, and print it (see how to print passport photos yourself here).

Should you create a passport photo with GIMP? Pros and cons
Creating passport photos is not a walk in a park. If you want to take the passport photograph yourself, you need to make sure it meets all of the governmental requirements.
The first challenge comes with taking the picture. If you do not have your photograph already taken, see this guide to learn how to take a passport photo at home.
Once you have your photograph, you need to edit it adequately. Beware that the U.S. Department of States requires passport photographs to meet all of the guidelines, such as: proper cropping, proportions, size, quality, background, and more.
If you do not have prior experience with GIMP and passport photo regulations, you may consider using other options – scroll down to see our alternatives to GIMP.
Here are the pros and cons of taking and editing passport photos yourself:
PROS:
✅ You can take and edit pictures yourself at home.
✅ You can re-take and re-edit your new passport photos until you are satisfied with the final result.
✅ You can use digital photos for multiple occasions, saving you a significant amount of money.
✅ And finally – it’s free.
CONS:
❌The hardest part here is to have a perfectly white background. Creating a perfect background in GIMP, without professional lighting requires advanced editing skills.
❌U.S. passport agencies have extremely strict requirements for the format of the photos. For example, the distance of the eye line from the top edge must be from 1 -1 3/8 inches.
❌All the steps are performed by you and there is no one to validate the photos with the requirements.
❌You need to understand how to use GIMP.
U.S. passport photo in GIMP: making 2×2 inches images
So how can you actually edit your U.S. passport photo using GIMP? Follow the steps below:
- You will need to open your GIMP program and upload your already taken U.S. passport photo.
- Open the section called “Toolbox” and select a tool called “Rectangular Select” with which you should crop a small rectangle around your face and shoulders – make sure that you take into account your whole head, along with your hair.
- Go to the left hand-panel, and in the section “Size”, put in these measurements: width – 510px, height – 510px. Later click on “Fixed Aspect Ratio”, and using the mouse, select the photo like you did before – the face should take around 70-80% of the picture.
- Crop your photo using the “Image” section in the menu bar, where you can put in “Crop to Selection.”
- Go to the section “Image”, and this time select the “Scale Image” tool. Put in 1089px for the width and the same for the height. Make sure to copy the picture.
- Open a new window in the program and choose the width and height to 1120px There you should paste the copied picture from the previous point.
- Click on the white border and from the menu bar choose “Filters” -> “Map” -> “Tile” and tile the picture to the new size.
- Disconnect the symbol that looks like a chain by clicking on it. This time you will need to select the size to: width – 3256px, height – 2184px. This should show you 8 images in total. Save them as a JPG to your computer.
Passport photos in GIMP – an easy-to-use alternative
GIMP is not the easiest photo editing platform to use. What is more, there are some aspects you need to take care of yourself, such as background and face proportions.
If you cannot take a picture against a white background, and decide to cut it out yourself, your newly created passport photographs may be rejected by the authorities.
That’s why you should consider alternatives to GIMP, such as online photo converters that will automatically adjust your home-made pictures to passport photo standards.
There are dozens of tools available, such as PhotoAiD, VisaPhoto, or 123PassportPhoto, but in our opinion PhotoAiD provides one of the best quality for the price.
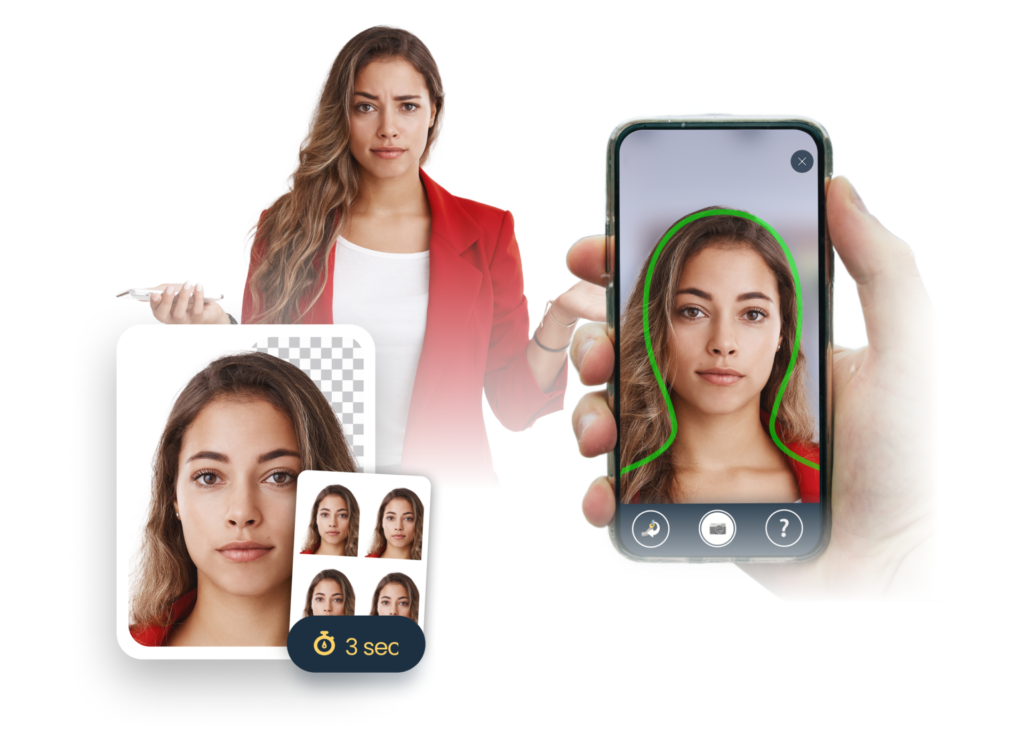
PhotoAiD photo converter will edit your image and replace the background of the photo according to the official requirements.
That means you can snap your passport photo literally anywhere – in your room or on your way to a passport facility, as PhotoAiD will flawlessly replace your surroundings with a plain white background.
Your final image will go through a compliance check, to ensure your new passport photo is suitable for admission.
What makes this tool truly stand out compared to GIMP is that no experience is required to use it. The program performs all actions automatically.
Go to the website, or download the app on your phone from the App Store or Google Play Market and take your new passport photo in less than a minute.
SEE HOW TO TAKE PASSPORT PHOTOS YOURSELF:
- Can I Take a 2 x 2 inches Passport Photo With an Android Phone?
- Passport Photo With an iPhone: How to Do It?
U.S. passport photo in GIMP – summed up
Making a U.S. passport photo in GIMP can seem a bit complicated and it does require some patience and a little time, especially if you don’t have a white background. To learn how to remove the original background you will have to spend some time on it (more than a day).
The whole process of taking and editing your passport photo is easier with online photo converters that will do all the work for you in around 3 (three) seconds, with a compliance guarantee.
U.S. passport photo in GIMP – FAQs
How do I resize a photo to passport size in GIMP?
You have to open the photo in GIMP, and choose the Crop tool. Now swipe the mouse with the left button pressed, selecting the approximate size of the new photo you want. Select the top menu Image / Image size – and enter the desired size of the photo for your passport. For the U.S. passport photo you need to type this size 2 x 2 inches (51 x 51 mm).
How do you make a passport photo in GIMP?
Upload a finished passport image that needs to be edited in GIMP. Select the format of the future photo from the “Documents” menu (2 x 2 inches = 51 x 51 mm for a U.S. passport photo). GIMP will then crop the photo, respecting all the dimensions. You can save the result.
How much does it cost to make a U.S. passport photo using GIMP?
The GIMP program is free, so all you need to do in the end is print your passport photos which shouldn’t cost you more than half a dollar.
Do I have to have previous experience with GIMP to make a U.S. passport photo in it?
No, you can just follow our guide. It might take some more time if you’re inexperienced, but overall the result should be the same with a little patience.